Saturday 22 March 2014

5 Easy Ways to Improve the SEO of a blog & Boost Traffic

5 easy ways to improve the SEO of a blog 

A blogger needs to know at least the minimum on SEO. For it, you don't need to be an SEO expert but you need to know the minimum so that your posts are well indexed in the search engines.

The phrase "content is king" is one of the widest spread Internet memes being used by so many bloggers, with the idea that you should focus on having quality content, while the rest don't matter much. This is not true. Quality content is important, but it shouldn't be the only concern of a blogger today. In addition to producing quality content, your text needs to be optimized for the search engines.

improve seo, seo tips, boost traffic
Boost traffic & increase SERP visibility with SEO

5 easy ways to improve the SEO of a blog

Now, let's see what would be the basics that any blogger needs to learn about SEO and other simple SEO knowledge. Below are 5 easy tips to improve the SEO of your blog:

1. Define the keyword

When you write a post, it is recommended to choose the keyword (or term) suitable for your text. What you want is that this keyword - or term - to be searched on Google, and then get your post among the top. For this, you need to use this keyword a few times in the text.

For example, here the keyword could be SEO, but this term is too generic and I could hardly get in the top for this search. Then I'll work with a phrase or a long tail keyword, so that this post will rank for the term "easy ways to improve the SEO of a blog". I will use this phrase a few times, but without overdoing it.

2. Use the keyword in the post title

Now that I have defined the keyword, I will use it in the post title. This step is very important, and certainly will help you to get a better rank in search engines. As you can see, what I have in the title is the easy ways to improve the SEO of a blog keyword, along with other words to form an attractive and optimized title for SEO.

3. Use the keyword in the H2 tags

You must also use heading tags (h2, h3) in your posts. Here, I am using the keyword "easy ways to improve the SEO of a blog" in a H2 heading. Do this always, because it also helps to become well positioned in the search results. If you don't know or don't understand what are the heading tags, I would suggest to do a further research on this subject.

use keyword in h2 tags

4. Use the keyword in the text

Make use of your chosen keywords throughout the text. Especially in the first paragraph (please note that I have repeated the title in italics in the first sentence). But be careful when doing this, there is a maximum and minimum limit for that. A good keyword density is between 1.5% to 4.5% for best results. Less than that will have no effect and more than that can alert the search engines and your text might be considered spam.

5. Publish Posts with 300 words or more

Posts under 300 words have little chance to be among the top results in search engines. Of course, you will be able to rank for multiple keywords that are less popular with less than 300 words, but for the most competitive keywords that have the potential to bring a greater number of visits, it will be nearly impossible.

Thus, it is recommended to write posts with more than 300 words. It's not hard when you really understand the topic you're talking about.

Conclusion

As you can see, with some simple SEO techniques you can improve the traffic coming to your blog from the search engines. I hope you enjoyed these 5 easy ways to improve the SEO of a blog!

What is the difference between padding and margins?

For those who would like to know more about HTML and CSS, today we will see about the difference between margin and padding CSS properties which allow us to add blank space between the HTML elements, preventing the elements from getting 'stuck' together.

Although both possess similar functions, each has its particularity. 
  1. Padding determines the inner margins, being responsible for determining the distance between the content of a given element and its border.
  2. Margin is applied to the outside of an element affecting how far the element is away from other elements.
For more info, please take a look at the picture below:

padding and margin, css proprieties
Difference between margin and padding

Just as you have the option to define the borders for each side of your HTML elements (eg. borders in the sidebar), you can do the same with the margin and padding properties. All you need to to do is to change the top, right, bottom and left values??.
These values ??that you can select include: pixels (px), centimeters (cm), millimeters (mm). em units (em), x-height (ex), inches (in), picas (pc) and point sizes (pt).

By using margin and padding, you should add each value set in the four corners, as follows: top, right, bottom, left and each value must refer to each side of the HTML element. The first value is for the top, and they follow a clockwise direction, so the value would be close to the right, then bottom and finally, left.

Example 1: 

padding:5px 15px 5px 15px;
- top padding is 5px 
- right padding is 15px 
- bottom padding is 5px 
- left padding is 15px  

margin: 10px 5px 10px 5px;
- top margin is 10px
- right margin is 5px
- bottom margin is 10px
- left margin is 5px

If you define a single value, the distance applies to all sides, so it will be applied to the 4 sides of the HTML element that you want to modify.

Example 2:
padding: 5px (top and bottom) 15px (left and right);
margin: 10px (top and bottom) 5px (left and right);

If it helps to do it visually, think of an A4 page of type inside a picture frame. The margin is the space between the edge of the sheet of paper and the other elements (the parts of the frame) and the padding would be the space between the edge of the sheet and where the type starts on the page. The border would be the edge of the sheet of paper.

It's probably easier to understand if you have borders, then it also becomes obvious which one to use. Do you want the "space" after the border (outside the element = margin) or before the border (inside the element = padding).

Sunday 9 March 2014

Add a Custom jQuery Lightbox To Blogger

If you are not satisfied with the default Lightbox set up by Blogger, here's another amazing way to show off your pictures. If you've missed out, I have already shown in one of my posts how to customize the Blogger Lightbox by changing the background color, borders or the text color, but this tutorial will show you how to replace it entirely with a cool jQuery Lightbox plugin that is very popular among bloggers.

What this Lightbox does, is to display larger versions of the images that will pop-up into a larger box once we click on them, and allows us to easily navigate through that set of photos by using the previous and next buttons.

jquery lightbox, blogger plugins

To see it in action, please visit the following demo blog and click on any picture to enlarge it.


Adding jQuery Lightbox to Blogger

Step 1. From your Blogger Dashboard, click on Template > Edit HTML

blogger edit html

Step 2. Click anywhere on the code area and press the CTRL + F keys to open the search box. Paste the following tag inside the search box and hit Enter to find it:
]]></b:skin>
Step 3. Choose one of the Lighbox styles from below and paste the CSS code just above the aforementioned ]]></b:skin> tag:

Custom Blogger Lightbox with White Background


jquery lightbox white
#jquery-overlay{position:absolute;top:0;left:0;z-index:90;width:100%;height:500px;}
#jquery-lightbox{position:absolute;top:10%;left:0;width:100%;z-index:100;text-align:center;line-height:0;}
#jquery-lightbox a,#jquery-lightbox a:hover{border:none;}
#jquery-lightbox a img{border:none;}
#lightbox-container-image-box{position:relative;background-color:#fff;max-width: 960px;max-height: 560px;margin:0 auto;}
#lightbox-container-image{padding:10px;}
img#lightbox-image {max-height: 540px;max-width: 940px;}
#lightbox-loading{position:absolute;top:40%;left:0%;height:25%;width:100%;text-align:center;line-height:0;}
#lightbox-nav{position:absolute;top:0;left:0;height:100%;width: 100%;z-index:10;}
#lightbox-container-image-box > #lightbox-nav{left:0;}
#lightbox-nav a{outline:none;}
#lightbox-nav-btnPrev,#lightbox-nav-btnNext{width:49%;height:100%;zoom:1;display:block;}
#lightbox-nav-btnPrev{left:10%;float:left;}
#lightbox-nav-btnNext{right:10%;float:right;}
#lightbox-container-image-data-box{font:10px Verdana,Helvetica,sans-serif;background-color:#fff;margin:0 auto;line-height:1.4em;overflow:auto;max-width: 940px;;padding:0 10px 0;}
#lightbox-container-image-data{padding:0 10px;color:#555;}
#lightbox-container-image-data #lightbox-image-details{width:70%;float:left;text-align:left;}
#lightbox-image-details-caption{font-weight:bold;}
#lightbox-image-details-currentNumber{display:block;clear:left;padding-bottom:1.0em;}
#lightbox-secNav-btnClose{width:66px;float:right;padding-bottom:0.7em;}

Custom Blogger Lightbox with Dark Background:


jquery lightbox dark
#jquery-overlay{position:absolute;top:0;left:0;z-index:90;width:100%;height:500px;}
#jquery-lightbox{position:absolute;top:10%;left:0;width:100%;z-index:100;text-align:center;line-height:0}
#jquery-lightbox a,#jquery-lightbox a:hover{border:none}
#jquery-lightbox a img{border:none;}
#lightbox-container-image-box{position:relative;background-color:#000;max-width: 960px;max-height: 560px;margin:0 auto}
#lightbox-container-image{padding:10px;}
img#lightbox-image {max-height: 540px;max-width: 940px;}
#lightbox-loading{position:absolute;top:40%;left:0%;height:25%;width:100%;text-align:center;line-height:0}
#lightbox-nav{position:absolute;top:0;left:0;height:100%;width: 100%;z-index:10}
#lightbox-container-image-box > #lightbox-nav{left:0;}
#lightbox-nav a{outline:none}
#lightbox-nav-btnPrev,#lightbox-nav-btnNext{width:49%;height:100%;zoom:1;display:block}
#lightbox-nav-btnPrev{left:10%;float:left}
#lightbox-nav-btnNext{right:10%;float:right}
#lightbox-container-image-data-box{font:10px Verdana,Helvetica,sans-serif;background-color:#000;margin:0 auto;line-height:1.4em;overflow:auto;max-width: 940px;;padding:0 10px 0}
#lightbox-container-image-data{padding:0 10px;color:#fff}
#lightbox-container-image-data #lightbox-image-details{width:70%;float:left;text-align:left}
#lightbox-image-details-caption{font-weight:bold}
#lightbox-image-details-currentNumber{display:block;clear:left;padding-bottom:1.0em}
#lightbox-secNav-btnClose{width:66px;float:right;padding-bottom:0.7em}
Step 4. Now find the following tag and just above it, add the below scripts:
</head>

Script for Lightbox with Light Background:

<script src='http://ajax.googleapis.com/ajax/libs/jquery/1/jquery.min.js' type='text/javascript'/>
<script type='text/javascript'>
//<![CDATA[
(function(a){a.fn.lightBox=function(p){p=jQuery.extend({overlayBgColor:"#000",overlayOpacity:0.9,fixedNavigation:false,imageLoading:"https://blogger.googleusercontent.com/img/b/R29vZ2xl/AVvXsEiZgn51Mk4EOclVMNrYprVxv3IGNZ8L7me0njiHXXg0OhF4VNHbPRdXsYgUPpy1q_uypp2Hq34SWYptyzZhlFU3xdtw4dEIu_BJd_iO7ZBSpuaNOPso5yhP-Iqv0q6s4lcG5CoKLx5c7W0/s1600/loading.gif",imageBtnPrev:"https://blogger.googleusercontent.com/img/b/R29vZ2xl/AVvXsEgKdtUkaLe6nWAfk1aQdWYgIOwbC3ERHSdCq20VyyA3sqwRXi9wiGMZdRpAHWdToAJ7Ap_flSALGf8uORkDhcakGIO-IAf26nn6C3VyAMMemuDSbuWEMS8hLpyMTdL6NUg4Id9E5lcHNQI/s1600/prev-image.gif",imageBtnNext:"https://blogger.googleusercontent.com/img/b/R29vZ2xl/AVvXsEi4vYAYmUUKrTwoUz0xIP_87lHWSBW2Q5OVwgsB_uEsPdczRGTkDvN7RrKlBAIPCpjFUrmr-b8_IkZFJl0yv8tIz8XLUfiLRc40Cyj66eDr0PRbfwamrczLVd16ZAac9t4Oc24iUo4RcfQ/s1600/next-image.gif",imageBtnClose:"https://blogger.googleusercontent.com/img/b/R29vZ2xl/AVvXsEg7iM0QHbt6FfKyCfZK1QPsKHcfCSx3ZRcPqCVniQ3brHiCtMmhKnEC4W_QZXVH9B4xsJIcKwgCrSWan2qU9A2vgJc6IvHiXhN6vFGA_W_b4FpQLlksnYR6yThGo6RMP_EWh2qq-PO4MVw/s1600/close-image.gif",imageBlank:"https://blogger.googleusercontent.com/img/b/R29vZ2xl/AVvXsEhlOuivvpNQlCxHpo3JyeXpe3PPGGbH-UgBxx5R4DogkjyhlviSXROGh8YeSmONFqYUwQk2K5lECAcvLWCpgrWIFfUVuiwKRkRB8IRfrL5YU6HZH8-aqWDDpq7hk4DcFEyiyTDMLcfbue4/s1600/blank.gif",containerBorderSize:10,containerResizeSpeed:400,txtImage:"Image",txtOf:"of",keyToClose:"c",keyToPrev:"p",keyToNext:"n",imageArray:[],activeImage:0},p);var i=this;function r(){o(this,i);return false}function o(v,u){a("embed, object, select").css({visibility:"hidden"});c();p.imageArray.length=0;p.activeImage=0;if(u.length==1){p.imageArray.push(new Array(v.getAttribute("href"),v.getAttribute("title")))}else{for(var t=0;t<u.length;t++){p.imageArray.push(new Array(u[t].getAttribute("href"),u[t].getAttribute("title")))}}while(p.imageArray[p.activeImage][0]!=v.getAttribute("href")){p.activeImage++}l()}function c(){a("body").append('<div id="jquery-overlay"></div><div id="jquery-lightbox"><div id="lightbox-container-image-box"><div id="lightbox-container-image"><img id="lightbox-image"><div style="" id="lightbox-nav"><a href="#" id="lightbox-nav-btnPrev"></a><a href="#" id="lightbox-nav-btnNext"></a></div><div id="lightbox-loading"><a href="#" id="lightbox-loading-link"><img src="'+p.imageLoading+'"></a></div></div></div><div id="lightbox-container-image-data-box"><div id="lightbox-container-image-data"><div id="lightbox-image-details"><span id="lightbox-image-details-caption"></span><span id="lightbox-image-details-currentNumber"></span></div><div id="lightbox-secNav"><a href="#" id="lightbox-secNav-btnClose"><img src="'+p.imageBtnClose+'"></a></div></div></div></div>');var t=f();a("#jquery-overlay").css({backgroundColor:p.overlayBgColor,opacity:p.overlayOpacity,width:t[0],height:t[1]}).fadeIn();var u=h();a("#jquery-lightbox").css({top:u[1]+(t[3]/10),left:u[0]}).show();a("#jquery-overlay,#jquery-lightbox").click(function(){b()});a("#lightbox-loading-link,#lightbox-secNav-btnClose").click(function(){b();return false});a(window).resize(function(){var v=f();a("#jquery-overlay").css({width:v[0],height:v[1]});var w=h();a("#jquery-lightbox").css({top:w[1]+(v[3]/10),left:w[0]})})}function l(){a("#lightbox-loading").show();if(p.fixedNavigation){a("#lightbox-image,#lightbox-container-image-data-box,#lightbox-image-details-currentNumber").hide()}else{a("#lightbox-image,#lightbox-nav,#lightbox-nav-btnPrev,#lightbox-nav-btnNext,#lightbox-container-image-data-box,#lightbox-image-details-currentNumber").hide()}var t=new Image();t.onload=function(){a("#lightbox-image").attr("src",p.imageArray[p.activeImage][0]);j(t.width,t.height);t.onload=function(){}};t.src=p.imageArray[p.activeImage][0]}function j(w,z){var t=a("#lightbox-container-image-box").width();var y=a("#lightbox-container-image-box").height();var x=(w+(p.containerBorderSize*2));var v=(z+(p.containerBorderSize*2));var u=t-x;var A=y-v;a("#lightbox-container-image-box").animate({width:x,height:v},p.containerResizeSpeed,function(){g()});if((u==0)&&(A==0)){if(a.browser.msie){n(250)}else{n(100)}}a("#lightbox-container-image-data-box").css({width:w});a("#lightbox-nav-btnPrev,#lightbox-nav-btnNext").css({height:z+(p.containerBorderSize*2)})}function g(){a("#lightbox-loading").hide();a("#lightbox-image").fadeIn(function(){k();s()});q()}function k(){a("#lightbox-container-image-data-box").slideDown("fast");a("#lightbox-image-details-caption").hide();if(p.imageArray[p.activeImage][1]){a("#lightbox-image-details-caption").html(p.imageArray[p.activeImage][1]).show()}if(p.imageArray.length>1){a("#lightbox-image-details-currentNumber").html(p.txtImage+" "+(p.activeImage+1)+" "+p.txtOf+" "+p.imageArray.length).show()}}function s(){a("#lightbox-nav").show();a("#lightbox-nav-btnPrev,#lightbox-nav-btnNext").css({background:"transparent url("+p.imageBlank+") no-repeat"});if(p.activeImage!=0){if(p.fixedNavigation){a("#lightbox-nav-btnPrev").css({background:"url("+p.imageBtnPrev+") left 15% no-repeat"}).unbind().bind("click",function(){p.activeImage=p.activeImage-1;l();return false})}else{a("#lightbox-nav-btnPrev").unbind().hover(function(){a(this).css({background:"url("+p.imageBtnPrev+") left 15% no-repeat"})},function(){a(this).css({background:"transparent url("+p.imageBlank+") no-repeat"})}).show().bind("click",function(){p.activeImage=p.activeImage-1;l();return false})}}if(p.activeImage!=(p.imageArray.length-1)){if(p.fixedNavigation){a("#lightbox-nav-btnNext").css({background:"url("+p.imageBtnNext+") right 15% no-repeat"}).unbind().bind("click",function(){p.activeImage=p.activeImage+1;l();return false})}else{a("#lightbox-nav-btnNext").unbind().hover(function(){a(this).css({background:"url("+p.imageBtnNext+") right 15% no-repeat"})},function(){a(this).css({background:"transparent url("+p.imageBlank+") no-repeat"})}).show().bind("click",function(){p.activeImage=p.activeImage+1;l();return false})}}m()}function m(){a(document).keydown(function(t){d(t)})}function e(){a(document).unbind()}function d(t){if(t==null){keycode=event.keyCode;escapeKey=27}else{keycode=t.keyCode;escapeKey=t.DOM_VK_ESCAPE}key=String.fromCharCode(keycode).toLowerCase();if((key==p.keyToClose)||(key=="x")||(keycode==escapeKey)){b()}if((key==p.keyToPrev)||(keycode==37)){if(p.activeImage!=0){p.activeImage=p.activeImage-1;l();e()}}if((key==p.keyToNext)||(keycode==39)){if(p.activeImage!=(p.imageArray.length-1)){p.activeImage=p.activeImage+1;l();e()}}}function q(){if((p.imageArray.length-1)>p.activeImage){objNext=new Image();objNext.src=p.imageArray[p.activeImage+1][0]}if(p.activeImage>0){objPrev=new Image();objPrev.src=p.imageArray[p.activeImage-1][0]}}function b(){a("#jquery-lightbox").remove();a("#jquery-overlay").fadeOut(function(){a("#jquery-overlay").remove()});a("embed, object, select").css({visibility:"visible"})}function f(){var v,t;if(window.innerHeight&&window.scrollMaxY){v=window.innerWidth+window.scrollMaxX;t=window.innerHeight+window.scrollMaxY}else{if(document.body.scrollHeight>document.body.offsetHeight){v=document.body.scrollWidth;t=document.body.scrollHeight}else{v=document.body.offsetWidth;t=document.body.offsetHeight}}var u,w;if(self.innerHeight){if(document.documentElement.clientWidth){u=document.documentElement.clientWidth}else{u=self.innerWidth}w=self.innerHeight}else{if(document.documentElement&&document.documentElement.clientHeight){u=document.documentElement.clientWidth;w=document.documentElement.clientHeight}else{if(document.body){u=document.body.clientWidth;w=document.body.clientHeight}}}if(t<w){pageHeight=w}else{pageHeight=t}if(v<u){pageWidth=v}else{pageWidth=u}arrayPageSize=new Array(pageWidth,pageHeight,u,w);return arrayPageSize}function h(){var u,t;if(self.pageYOffset){t=self.pageYOffset;u=self.pageXOffset}else{if(document.documentElement&&document.documentElement.scrollTop){t=document.documentElement.scrollTop;u=document.documentElement.scrollLeft}else{if(document.body){t=document.body.scrollTop;u=document.body.scrollLeft}}}arrayPageScroll=new Array(u,t);return arrayPageScroll}function n(v){var u=new Date();t=null;do{var t=new Date()}while(t-u<v)}return this.unbind("click").click(r)}})(jQuery);$(document).ready(function(){$('a[href$=jpg]:has(img)').lightBox();$('a[href$=jpeg]:has(img)').lightBox();$('a[href$=png]:has(img)').lightBox();$('a[href$=gif]:has(img)').lightBox();$('a[href$=bmp]:has(img)').lightBox();});
//]]>
</script>

Script for Lightbox with Dark Background:

<script src='http://ajax.googleapis.com/ajax/libs/jquery/1/jquery.min.js' type='text/javascript'/>
<script type='text/javascript'>
//<![CDATA[
(function(a){a.fn.lightBox=function(p){p=jQuery.extend({overlayBgColor:"#000",overlayOpacity:0.9,fixedNavigation:false,imageLoading:"https://blogger.googleusercontent.com/img/b/R29vZ2xl/AVvXsEh3ByReNFmQ__f32ItEJxqB3CzR_uHrNH7ZKoGUTxo2I17HJr94DR8cfk1drp4DFF4b7CEcGjwPgFElUn22KSc0-cwXE4cciC-6hdGLcWefM0npgpgZrG-JsWg862GRoMRE_-e8Ukukk2I/s1600/loading-black.gif",imageBtnPrev:"https://blogger.googleusercontent.com/img/b/R29vZ2xl/AVvXsEiQsTK8Mkt9PWmGeV-Al3J62CxY3AzCuQQiHq-wEBP2AhVRFpJ0u-gR6rZY6rKhm1C3RHTYZCaLHdI0UDfeAmSAkq82DPjPI0fJSiIyX7ZzKZSG98zCBwPFfG3DwYjfooOqa8L_DIi7MLQ/s1600/prev-image-black.gif",imageBtnNext:"https://blogger.googleusercontent.com/img/b/R29vZ2xl/AVvXsEhRiEVb_dtOrIqT1TE_PERyjc_MdYRXNE-dotfAjWybkkXPbqN5_ABveZwDNlsHSFPnRhWoNuzOWNE8C4-k5-miN_UWK8CqV5OpYOmSHpZRuA77lkfxTOBYHdVo5YS9b359ZDSweqYw07s/s1600/next-image-black.gif",imageBtnClose:"https://blogger.googleusercontent.com/img/b/R29vZ2xl/AVvXsEgdx0_j6eb4mOCHyLTmWss0rp_UsjDHDMcdndvFYo8y9tXFLrvEkYKibM8JBXBaswVgnhZnQGIchRLS_ar8DCnTy_s6V0WuhgoDjqFfbZSRMWGyED_hZ0K5gIZ7IYhqEry_q-sEhq_rJoA/s1600/close-image-black.gif",imageBlank:"https://blogger.googleusercontent.com/img/b/R29vZ2xl/AVvXsEhlOuivvpNQlCxHpo3JyeXpe3PPGGbH-UgBxx5R4DogkjyhlviSXROGh8YeSmONFqYUwQk2K5lECAcvLWCpgrWIFfUVuiwKRkRB8IRfrL5YU6HZH8-aqWDDpq7hk4DcFEyiyTDMLcfbue4/s1600/blank.gif",containerBorderSize:10,containerResizeSpeed:400,txtImage:"Image",txtOf:"of",keyToClose:"c",keyToPrev:"p",keyToNext:"n",imageArray:[],activeImage:0},p);var i=this;function r(){o(this,i);return false}function o(v,u){a("embed, object, select").css({visibility:"hidden"});c();p.imageArray.length=0;p.activeImage=0;if(u.length==1){p.imageArray.push(new Array(v.getAttribute("href"),v.getAttribute("title")))}else{for(var t=0;t<u.length;t++){p.imageArray.push(new Array(u[t].getAttribute("href"),u[t].getAttribute("title")))}}while(p.imageArray[p.activeImage][0]!=v.getAttribute("href")){p.activeImage++}l()}function c(){a("body").append('<div id="jquery-overlay"></div><div id="jquery-lightbox"><div id="lightbox-container-image-box"><div id="lightbox-container-image"><img id="lightbox-image"><div style="" id="lightbox-nav"><a href="#" id="lightbox-nav-btnPrev"></a><a href="#" id="lightbox-nav-btnNext"></a></div><div id="lightbox-loading"><a href="#" id="lightbox-loading-link"><img src="'+p.imageLoading+'"></a></div></div></div><div id="lightbox-container-image-data-box"><div id="lightbox-container-image-data"><div id="lightbox-image-details"><span id="lightbox-image-details-caption"></span><span id="lightbox-image-details-currentNumber"></span></div><div id="lightbox-secNav"><a href="#" id="lightbox-secNav-btnClose"><img src="'+p.imageBtnClose+'"></a></div></div></div></div>');var t=f();a("#jquery-overlay").css({backgroundColor:p.overlayBgColor,opacity:p.overlayOpacity,width:t[0],height:t[1]}).fadeIn();var u=h();a("#jquery-lightbox").css({top:u[1]+(t[3]/10),left:u[0]}).show();a("#jquery-overlay,#jquery-lightbox").click(function(){b()});a("#lightbox-loading-link,#lightbox-secNav-btnClose").click(function(){b();return false});a(window).resize(function(){var v=f();a("#jquery-overlay").css({width:v[0],height:v[1]});var w=h();a("#jquery-lightbox").css({top:w[1]+(v[3]/10),left:w[0]})})}function l(){a("#lightbox-loading").show();if(p.fixedNavigation){a("#lightbox-image,#lightbox-container-image-data-box,#lightbox-image-details-currentNumber").hide()}else{a("#lightbox-image,#lightbox-nav,#lightbox-nav-btnPrev,#lightbox-nav-btnNext,#lightbox-container-image-data-box,#lightbox-image-details-currentNumber").hide()}var t=new Image();t.onload=function(){a("#lightbox-image").attr("src",p.imageArray[p.activeImage][0]);j(t.width,t.height);t.onload=function(){}};t.src=p.imageArray[p.activeImage][0]}function j(w,z){var t=a("#lightbox-container-image-box").width();var y=a("#lightbox-container-image-box").height();var x=(w+(p.containerBorderSize*2));var v=(z+(p.containerBorderSize*2));var u=t-x;var A=y-v;a("#lightbox-container-image-box").animate({width:x,height:v},p.containerResizeSpeed,function(){g()});if((u==0)&&(A==0)){if(a.browser.msie){n(250)}else{n(100)}}a("#lightbox-container-image-data-box").css({width:w});a("#lightbox-nav-btnPrev,#lightbox-nav-btnNext").css({height:z+(p.containerBorderSize*2)})}function g(){a("#lightbox-loading").hide();a("#lightbox-image").fadeIn(function(){k();s()});q()}function k(){a("#lightbox-container-image-data-box").slideDown("fast");a("#lightbox-image-details-caption").hide();if(p.imageArray[p.activeImage][1]){a("#lightbox-image-details-caption").html(p.imageArray[p.activeImage][1]).show()}if(p.imageArray.length>1){a("#lightbox-image-details-currentNumber").html(p.txtImage+" "+(p.activeImage+1)+" "+p.txtOf+" "+p.imageArray.length).show()}}function s(){a("#lightbox-nav").show();a("#lightbox-nav-btnPrev,#lightbox-nav-btnNext").css({background:"transparent url("+p.imageBlank+") no-repeat"});if(p.activeImage!=0){if(p.fixedNavigation){a("#lightbox-nav-btnPrev").css({background:"url("+p.imageBtnPrev+") left 15% no-repeat"}).unbind().bind("click",function(){p.activeImage=p.activeImage-1;l();return false})}else{a("#lightbox-nav-btnPrev").unbind().hover(function(){a(this).css({background:"url("+p.imageBtnPrev+") left 15% no-repeat"})},function(){a(this).css({background:"transparent url("+p.imageBlank+") no-repeat"})}).show().bind("click",function(){p.activeImage=p.activeImage-1;l();return false})}}if(p.activeImage!=(p.imageArray.length-1)){if(p.fixedNavigation){a("#lightbox-nav-btnNext").css({background:"url("+p.imageBtnNext+") right 15% no-repeat"}).unbind().bind("click",function(){p.activeImage=p.activeImage+1;l();return false})}else{a("#lightbox-nav-btnNext").unbind().hover(function(){a(this).css({background:"url("+p.imageBtnNext+") right 15% no-repeat"})},function(){a(this).css({background:"transparent url("+p.imageBlank+") no-repeat"})}).show().bind("click",function(){p.activeImage=p.activeImage+1;l();return false})}}m()}function m(){a(document).keydown(function(t){d(t)})}function e(){a(document).unbind()}function d(t){if(t==null){keycode=event.keyCode;escapeKey=27}else{keycode=t.keyCode;escapeKey=t.DOM_VK_ESCAPE}key=String.fromCharCode(keycode).toLowerCase();if((key==p.keyToClose)||(key=="x")||(keycode==escapeKey)){b()}if((key==p.keyToPrev)||(keycode==37)){if(p.activeImage!=0){p.activeImage=p.activeImage-1;l();e()}}if((key==p.keyToNext)||(keycode==39)){if(p.activeImage!=(p.imageArray.length-1)){p.activeImage=p.activeImage+1;l();e()}}}function q(){if((p.imageArray.length-1)>p.activeImage){objNext=new Image();objNext.src=p.imageArray[p.activeImage+1][0]}if(p.activeImage>0){objPrev=new Image();objPrev.src=p.imageArray[p.activeImage-1][0]}}function b(){a("#jquery-lightbox").remove();a("#jquery-overlay").fadeOut(function(){a("#jquery-overlay").remove()});a("embed, object, select").css({visibility:"visible"})}function f(){var v,t;if(window.innerHeight&&window.scrollMaxY){v=window.innerWidth+window.scrollMaxX;t=window.innerHeight+window.scrollMaxY}else{if(document.body.scrollHeight>document.body.offsetHeight){v=document.body.scrollWidth;t=document.body.scrollHeight}else{v=document.body.offsetWidth;t=document.body.offsetHeight}}var u,w;if(self.innerHeight){if(document.documentElement.clientWidth){u=document.documentElement.clientWidth}else{u=self.innerWidth}w=self.innerHeight}else{if(document.documentElement&&document.documentElement.clientHeight){u=document.documentElement.clientWidth;w=document.documentElement.clientHeight}else{if(document.body){u=document.body.clientWidth;w=document.body.clientHeight}}}if(t<w){pageHeight=w}else{pageHeight=t}if(v<u){pageWidth=v}else{pageWidth=u}arrayPageSize=new Array(pageWidth,pageHeight,u,w);return arrayPageSize}function h(){var u,t;if(self.pageYOffset){t=self.pageYOffset;u=self.pageXOffset}else{if(document.documentElement&&document.documentElement.scrollTop){t=document.documentElement.scrollTop;u=document.documentElement.scrollLeft}else{if(document.body){t=document.body.scrollTop;u=document.body.scrollLeft}}}arrayPageScroll=new Array(u,t);return arrayPageScroll}function n(v){var u=new Date();t=null;do{var t=new Date()}while(t-u<v)}return this.unbind("click").click(r)}})(jQuery);$(document).ready(function(){$('a[href$=jpg]:has(img)').lightBox();$('a[href$=jpeg]:has(img)').lightBox();$('a[href$=png]:has(img)').lightBox();$('a[href$=gif]:has(img)').lightBox();$('a[href$=bmp]:has(img)').lightBox();});
//]]>
</script>
Step 5. Click on the "Save template" button to save the changes.

Finally, we need to disable the original Blogger Lightbox so that it doesn't interfere with this one that we just added: go to "Settings" > "Posts and comments" and on the right side, you will see the "Showcase images with Lightbox" section > select "No" and click on the "Save settings" button on the upper right side.

disable blogger lightbox

Now, view your blog and click on any image to see this Custom Blogger Lightbox in action. Enjoy!

How to Use Cookies in Javascript

Each time we visit a website, cookies can be stored to 'remember' things that we do while browsing a page. This may happen, for example, when we visit a page where we have to login with an username and a password. In this case, after verifying that the login is correct, usually a cookie is recorded on our computer.

An example would be the popular page of Google. This search engine allows users to choose how many search results they want to see on each page. Thanks to a cookie, this configuration remains unchanged for each computer, even after rebooting several sessions. Despite this, it is good to remove them from time to time because, although, some will expire being erased automatically after a while, some of them will never do so.
cookies with javascript, blogger tricks

Like many other things, cookies may suffer a poor use and hence their bad reputation. For instance, some websites can store and study the browsing habits of a user without their knowledge. This is why most browsers already include a system to filter them and can decide if they will provide some privacy or not.

If you want to see a live example of how a cookie works, please visit this page and refresh it a few times. You should get an alert window telling you about how many times you visited the page.
(script source: javascriptkit.com)

There could be other ways to use cookies but a server could do this with JavaScript. Below we have a simple script that can be used as many times we want, even for different purposes. Basically, what the following script does is to create three functions: the first one is to set a cookie, the second one is to read it, and the last one is to erase it. We can apply it in Blogger by accessing the template HTML and add it just before the </head> tag:
<script type='text/javascript'>
//<![CDATA[

// Set cookie
function setCookie(name, value, expires, path, domain, secure) {
document.cookie = name + "=" + escape(value) +
((expires == null) ? "" : "; expires=" + expires.toGMTString()) +
((path == null) ? "" : "; path=" + path) +
((domain == null) ? "" : "; domain=" + domain) +
((secure == null) ? "" : "; secure");
}

// Read cookie
function getCookie(name){
var cname = name + "=";
var dc = document.cookie;
if (dc.length > 0) {
begin = dc.indexOf(cname);
if (begin != -1) {
begin += cname.length;
end = dc.indexOf(";", begin);
if (end == -1) end = dc.length;
return unescape(dc.substring(begin, end));
}
}
return null;
}

//delete cookie
function eraseCookie (name,path,domain) {
if (getCookie(name)) {
document.cookie = name + "=" +
((path == null) ? "" : "; path=" + path) +
((domain == null) ? "" : "; domain=" + domain) +
"; expires=Thu, 01-Jan-70 00:00:01 GMT";
}
}

//]]>
</script>
Once done, in order to set a cookie, we only need to put the name and the value in quotes when we call the function. Additionally, we will set the expiry date by getting the current Time (in milliseconds) and add the required number of minutes (in milliseconds):
var expiration = new Date();
expiration.setTime(expiration.getTime() + 10000); //Expire after 10 seconds
setCookie("cookiename","hello",expiration);
}
The above code sets a cookie called cookiename, with the hello value and set its expiry date to 10 seconds after it has been set (10000 milliseconds = 10 seconds). If we want to restore the value of this cookie, then we should use the second function with the cookie name:
var checkCookie = getCookie("cookiename");
By adding this code below <body>, we created a cookie with the value 'hello' which can be shown on the screen if we want to. The cookie will disappear after 10 seconds:
<script type='text/javascript'>
var expiration = new Date();
expiration.setTime(expiration.getTime() + 10000);
setCookie("cookiename","hello",expiration);
var checkCookie = getCookie("cookiename");
document.write(checkCookie);
</script>
The erase function is used in the same way as the one for reading just by clicking on the name of the cookie. The setCookie values for 'domain' and 'secure' are not utilized. Use 'domain' on the Javascript cookie if you are using it on a subdomain, where the cookie is set on the widgets subdomain, but you need it to be accessible over the whole yoursite.com domain.

The combination of these three functions will allow us to handle cookies for specific purposes, as we will see in the near future.

Saturday 8 March 2014

How to Add CSS code To Blogger using Template Designer

If you are having difficulties adding the CSS codes in a Blogger template, here's a short guide that will show you a more practical and fast way to add CSS (Cascading Style Sheets) so that it will be easier for you to customize your blog.

Some readers have complained that when they had to add the CSS codes to install some feature in Blogger, they found it difficult to locate the ]]></b:skin> tag. So, I decided to make this quick tutorial to show you another way of adding the CSS without having to access the Blogger HTML editor.

Adding CSS via the Blogger Template Designer

Step 1. Log in to your Blogger account and select the blog that you want to customize.

Step 2. From the Blogger dashboard, choose "Template" and click on the "Customize" button.


Step 3. Click on the "Advanced" tab.

Step 4. Now just add your CSS code inside the right field, located in the "Add CSS" tab (if you have more options, you may need to scroll down the list). Here you can add any CSS code when you want to apply a new style to your template.


Step 5. Once added, click on the "Apply to blog" button to save the changes.

Following this method, you can't edit the existing CSS styles already added in your template which will require to access the template's HTML and make the modifications there. Here, you can only add new styles and edit the existing styles added through the Template Designer panel.

It's important to mention that when adding the CSS styles, it isn't required to put the <style type="text/css"> ... </style> style tags, which normally would go above the </head> tag of the template html. Adding those tags may result in an error.

If you change the template, the CSS added here will be removed. The same goes for any other additions or CSS customizations made ??through the Template HTML editor.

Wednesday 5 March 2014

How to add custom Variable definitions to Blogger

In this post we are going learn about the CSS Variable Definitions for Colors and Fonts that could be found at the top of the style sheet of a Blogger blog. The values for the Variable definitions can be modified directly through the Blogger Template Designer where are the settings for colors, backgrounds, fonts and font sizes.
blogger variable definitions

Most default Blogger templates, such as the Minima Template, use these settings for the CSS, which makes it easier to modify these variables through the Blogger dashboard, using the "Template Designer" (Template > Customize) editor and accessing to the "Advanced" section.

blogger template designer, variable definitions

If the definitions are already established in the CSS, we'll be able to change the background colors, font colors, styles or sizes, directly from our Blogger dashboard without having to touch the HTML code of our template.

If these values ??are not set, we can define them by creating our own variables. The more variables are created, the greater will be the ease of changing colors and fonts of the Page Elements by going to the "Template Designer" and accessing the "Advanced" tab.
In some cases, we can't change the color or font of a particular template if the designer has not implemented the variables in the template and didn't defined and specified a particular value directly into a property, and if there is no definition for these values??, we may not be able to customize it through the Blogger's Template Designer.

There are two types of variables:

1) Color Variable:
<Variable name="body.background.color" description="Outer Background" type="color" default="#66bbdd" value="#66bbdd"/>
In red is the variable name. Here you can put any name you want, however, it must not contain spaces, that's why we may see some variable names using a dot "." between each word.
In green is the description that will appear in the Fonts and Colors panel (it can contain spaces).
In blue is variable type, which in this case is "color"
In purple is the default value, which runs in the absence of any other value.
In orange is the value of the selected color.

2) Font Variable:
<Variable name="body.font" description="Font" type="font" default="normal normal 12px Arial, Tahoma, Helvetica, FreeSans, sans-serif" value="normal normal 12px Arial, Tahoma, Helvetica, FreeSans, sans-serif" />
In red the variable name without spaces.
In green the description of the variable, may contain spaces
In blue is the type of the variable, which in this case is font.
In purple the default font.
In orange is the font that you choose.

We can find the variables definitions in the <head> section of our Template by accessing the HTML code (click on the Edit HTML button). There we should see a pair of <b:skin>..</b:skin> tags. The CSS style declarations will go in between those tags, along with the variable names.

variable definitions

How to Create Variables with type Color

Now, let's see how we can create type="color" variables in our template.

Please copy the below snippet and replace the names and types as you like, then paste the code below this comment:
/* Variable definitions
   ====================
Code to copy:
 <Variable name="NAME" description="DESCRIPTION" type="color" default="#xxxxxx" value="#xxxxxx" />
For a better understanding, let's take a look at this example with variable of type "color":
<Variable name="variablecolor" description="Variable with light blue color" type="color" default="#DDF2FF" value="#DDF2FF" />
color variable type

Here I have created a variable of type "color", with the "variablecolor" name. The color values (#DDF2FF) can be applied to all the borders of my blog and whenever I want to apply color styles to a specific border, I will type it like this:
border: 1px solid $variablecolor;
Note that I have added the "$" symbol before the variable's name which should be added everytime you want to implement a new variable definition.

Once we have created the variable, we can apply it on any property (not only borders) of any selector (page element) where it is possible applying the chosen color.

For example, if I want to add this color in the main-inner background (sidebar and posts area), I will add it just after the "main-inner" class selector, like this:
.main-inner {
background-color: $variablecolor;
}
variable type color, variable definitions

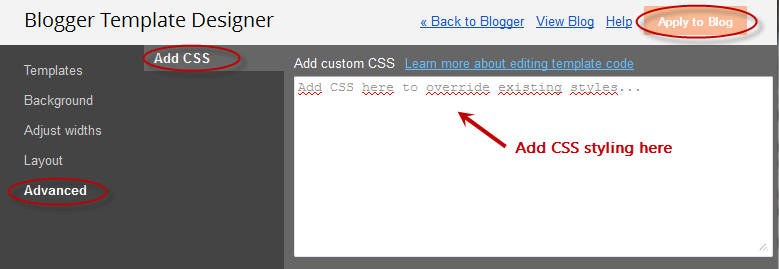
Now that a new variable has been established, save and return back to the blogger dashboard by clicking on the "Customize" button > Advanced tab. You will notice that there is a new variable called "Variable with light blue color" - to change the color, just use the color picker tool.

blogger template designer

How to Create Variables of type Font:

Now let's say I want to create a new variable of type="font" which I want to apply on the title of the sidebar gadgets. I will add it this way:
<Variable name="gadgetstitlefont" description="Gadgets Title Font" type="font" default="normal normal 16px Arial,Verdana,'Trebuchet MS',Trebuchet,Sans-serif"  value="normal normal 20px Cambria"/>
In this variable that I just created, the default font to be searched by the web browser should be Arial, and in its absence, Verdana and so on. Otherwise, apply the Cambria font which is actually the font that we want and which can be easily changed by accessing the Blogger Template Designer.

Once the font variable has been implemented, we can add it to any property of any selector where we want to define this font style.

To define where this variable should be applied (which, in my example, is the title of the sidebar gadgets), I will need to include the values ??directly in the "h2" property of the "sidebar" (sidebar-right-1) selector, by creating the following CSS rule:
#sidebar-right-1 h2 {
font: $gadgetstitlefont;
}
And I will add this above the ]]></b:skin> tag of the Template (don't forget to add the "$" symbol before the variable's name, otherwise it won't work).

variable font type

Now that we have given a new variable, Save the template and return to the Blogger dashboard by clicking on the Template > Customize button and access the Advanced tab. Scroll down and you will notice that there is a new variable named "Gadgets Title Font" - if you want to change the font type or size, you can do it directly by using this panel.

variable font type advanced

After you've decided what font style should be applied, click on the Apply to blog button on the right side.

apply to blog button

As you work on your template design, you can add lots of variables for different colors and fonts, however, for other types of CSS attributes, there's not necessary to create variables. The other types (such as margin, padding) can be included in the HTML of the template (above ]]></b:skin>) just as they normally would be.

Sunday 2 March 2014

Understanding the Page Elements of a Blogger Layout

When following a tutorial to add a gadget/widget or make some customizations in a Blogger blog, some new users may not know the meaning of certain terms, and sometimes, it may be harder to locate them. As for the gadgets, usually it is required to access the blog's layout in order to add or arrange any of the page elements.

For a better understanding, here are some basic explanations about the Page Elements located in the Layout section of a Blogger dashboard.

What are the Page Elements?

Page Elements is, basically, the body of our blog. To access the Page Elements, we need to click on the "Layout" option in the Blogger dashboard.


Understanding the Page Elements sections

The Blogger Layout is made of "sections and elements". The sections mark certain areas of a page. Every section is represented by the tag <b:section> and has an unique "ID" that names its element which is followed by a "class" tag. Each section has some attributes and through these, we can determine the number of elements allowed in the section and if this section gives the option to add a "page element".


Let's take a look to an example of the default code related to the header section found in the HTML of a Blogger template:
<b:section class='header' id='header' maxwidgets='1' showaddelement='no'>
<-- rest of the code -->
</b:section>
Breaking apart the code above:
  1. <b:section is the opening tag of the section.
  2. class='header' - describes the existing group inside the "header" element
  3. id='header' - identifies and specifies the header as a single element.
  4. maxwidgets='1' - determines the number of elements allowed in the "header"; here we have the number of gadgets that we can include in the header section. In this example, '1' means that this section allows us to add only a gadget.
  5. showaddelement='no' - the 'no' attribute means that the header will not show the "Add a gadget" link or we won't be able to move any Page Elements. To activate this option so that we can add new Page Elements (Add a gadget), we should change 'no' to 'yes'. By setting the "showaddelement" attribute to 'yes', we'll be able to arrange the elements as we like, just click on the element that you want to move and drag & drop it wherever you want.
The spaces reserved for adding elements in the existing sections are called Gadgets (or Widgets). You can easily add various Page Elements by clicking "Add a Gadget" link. This will open a pop-up window for you to pick and choose which elements should be added. Click on the Gadget's title or on the blue plus sign symbol to add it to your blog's layout.


After you have added a page element, gadgets can be moved up, down or sideways. You can put them wherever you want. Of all the existing gadgets, the most used is the "HTML/JavaScript". Inside this gadget (widget) you can insert any code, as long as it is in the HTML or JavaScript language.

Each time you decide to add a new gadget, click on the "Add a gadget" link in the area where you want to add it. For example, if you want to add a JavaScript code and want it to appear in the sidebar, you should click on the "Add a gadget" in the "sidebar" section, choose the "HTML/JavaScript" option and paste the code in there.

Once you have added new gadgets (widgets), it is recommended to check the changes by clicking on the Preview button before saving anything. So, if something went wrong, you simply click on "Clear" so that everything that was not saved to return to its previous state. If the position of any Page Elements (Gadgets) has been rearranged, you will need to click on the Save arrangement button in order to see the changes.